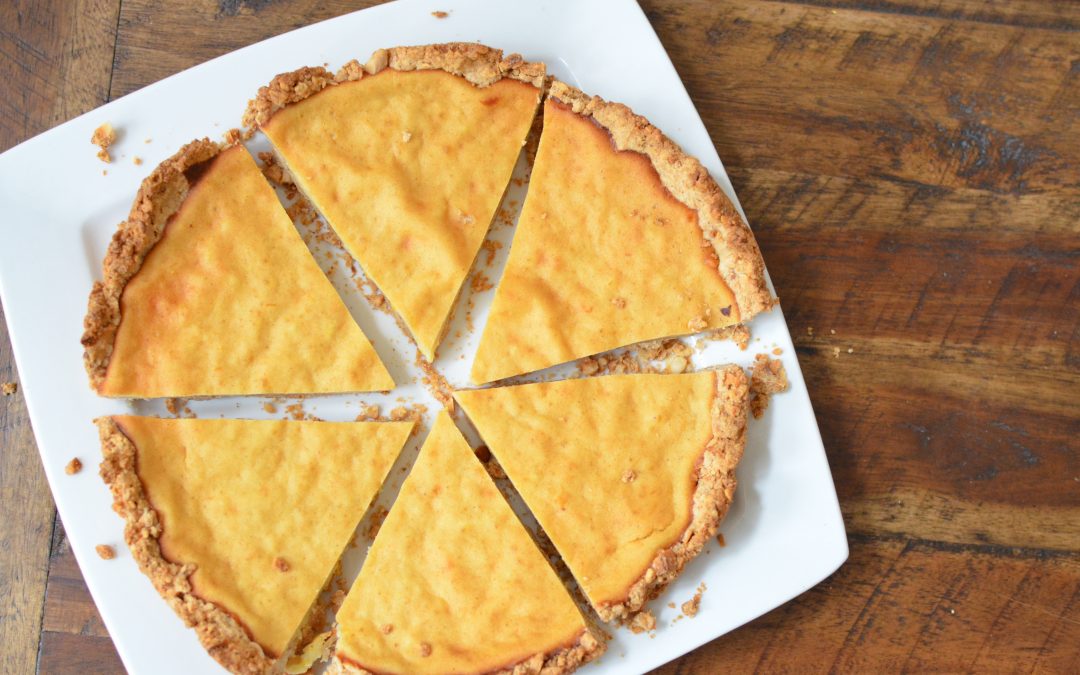
Did you know that you could eat pie for breakfast? This easy Orange Breakfast Pie is a great option to make the night before you have guests for breakfast. The best part is that it only looks complicated; it should not take more than 30 minutes of “hands on” time to make.
This Orange Breakfast Pie crust is made with nuts instead of pastry dough so it provides a serving of protein and good fats. The pie filling is made with healthy ingredients like cottage cheese and the juice and zest from oranges. Thanks to the orange (a citrus fruit) it is also packed with Vitamin C. We love the subtle citrus flavor of the filling combined with the nutty flavor of the crust. We think it is the perfect compliment to coffee for adults. Kids can have it with a glass of milk instead. The best part of this recipe though is that it is nutritious!
Preheat the oven to 375 degrees and line the inside of a 8 inch cake pan with tin foil. Spray well with nonstick spray.
Use a food processor to grind up the cashews so they are chunky, not finely processed. Set aside.
Add the flour to the nuts, then add the rest of the ingredients for the crust, except the egg white. Using your hands, mix the ingredients until they are combined.
Add the egg white and continue using your hands to mix until the mixture loses its stickiness.
Transfer the dough into the cake pan and press up the sides and bottom until it is evenly distributed.
Bake for 15 minutes until the crust is golden brown.
Let the crust cool while making your filling and reduce the oven temperature to 350 degrees.
Use your food processor again to add in all the ingredients for the filling. Blend until smooth.
Pour the filling into the cooled crust, transfer to the oven, and bake until the filling just begins to rise, about 35 minutes.
Let cool completely at room temperature and then refrigerate overnight.
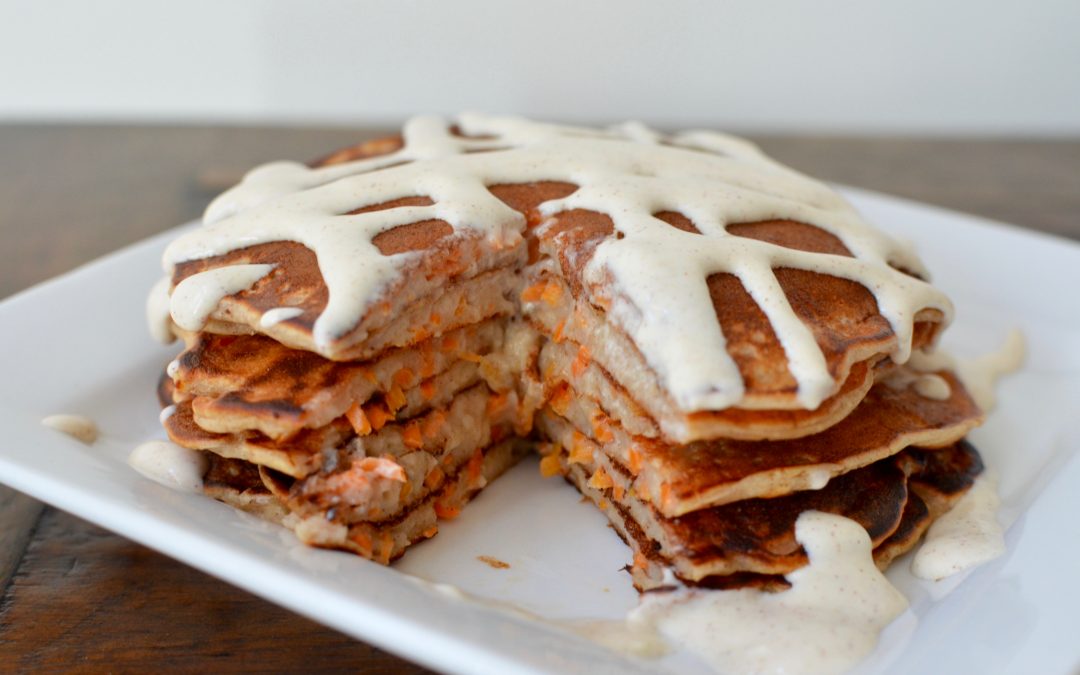
It never occurred to us that we could put vegetables into pancakes. Then we saw this recipe for Carrot Cake Pancakes. We love pancakes, and we love carrot cake. So… why not give it a try? The healthy serving of carrots (from shredded carrots) in this recipe provides a more than a day’s worth of Vitamin A. Carrots also provide more fiber than plain pancakes.
Try making this recipe for Carrot Cake Pancakes the next time you want a treat and are in the mood for a savory twist. Need another reason to try this recipe? You will not believe it but there is no butter or sugar in these tasty hotcakes! The Greek yogurt gives these pancakes a light taste that won’t make you feel overly full. We highly recommend adding the cream cheese topping, but maple syrup works too.
Note that since this recipe does not have the ingredients of traditional pancakes, you will want to cook them slightly differently. The insides take longer to cook, so you will want to cover your pan with the lid while cooking so the insides heat up faster. We found this tip useful when making this tasty recipe for our breakfast. We hope you enjoy these Carrot Cake Pancakes as much as we did!
For the pancakes, first mix together the dry ingredients (flour, baking powder, cinnamon, nutmeg, and salt) in a medium bowl.
In a separate bowl, stir together the wet ingredients (coconut oil, vanilla, maple syrup and Greek yogurt), until thoroughly combined.
Add the wet ingredients to the dry ingredients, mix together well, then add the shredded carrots. Combine until all ingredients are mixed well.
Using a nonstick pan set to medium heat, pour about 1/4 cup of batter into a circular shape for each pancake onto the hot pan. Once it begins to bubble on top, use a spatula to flip and cover the pan with a lid for 3 minutes, checking halfway through to ensure the pancake does not burn.
Continue to cook for another 1-2 minutes until the pancakes are golden brown on each side.
To prepare the drizzle, stir together the Greek yogurt cream cheese, milk, and maple syrup in a small bowl. Transfer the mixture to a zip-topped bag and cut off a small corner of the bottom of the bag.
Top the pancakes with the cream cheese drizzle and pure maple syrup, if desired.
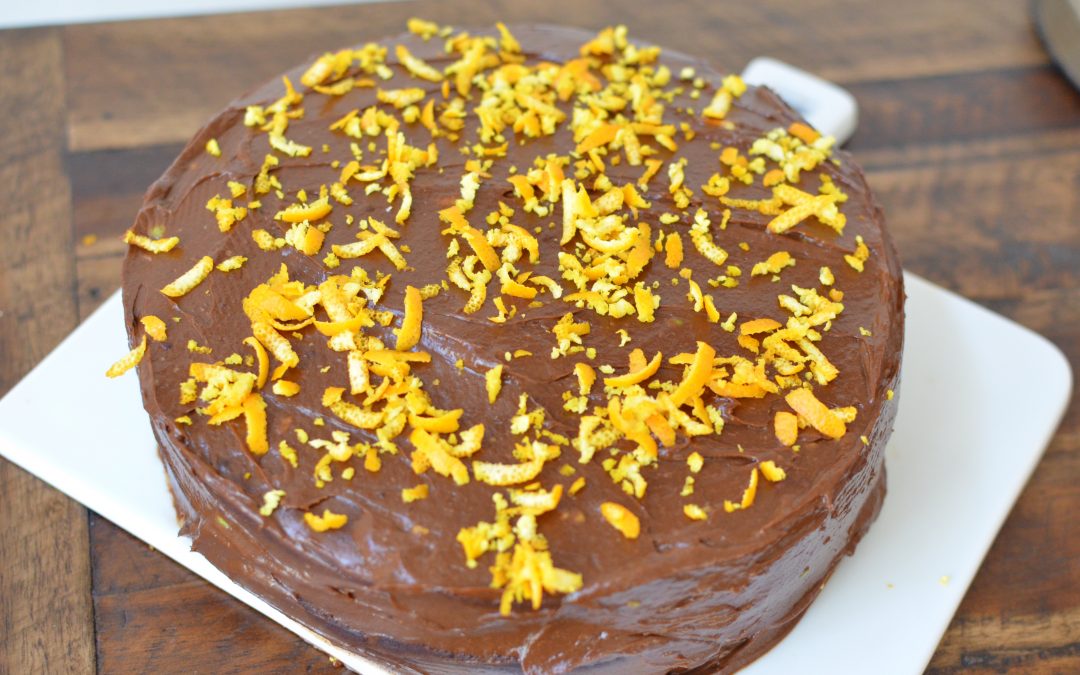
What can we say about this recipe… it is pretty much THE BEST healthy birthday cake recipe that we’ve ever tried! Make this Orange Chocolate Cake with Avocado Frosting for someone that you really care about. In fact, we made it for Dr. Michelle Lombardo (The OrganWise Guys President) since it was her birthday last week. If you didn’t see the video of our review, check it out on our Facebook page.
Citrus fruits like oranges are a December Foods of the Month. While it can be difficult to incorporate these fruits into a main dish, they make for excellent flavoring when using the fresh juice and zest. We never thought that we’d be baking with oranges, but once we saw this recipe we were sold. We love the combination of sweet orange and decadent dark chocolate.
This Orange Chocolate Cake with Avocado Frosting recipe uses healthy ingredients that are not normally in cakes. Save an hour of free time to make this cake. It takes some time but trust us, it is worth it!
Preheat your oven to 350 degrees and spray two round 8 inch cake pans with nonstick spray.
Mix the flour, ground almonds, polenta, cocoa, salt and baking powder in a large bowl. Use a fork to break up the polenta.
Add the dates to a food processor plus a splash of milk (if needed) and blend until a paste is formed.
Mix together the date paste with the milk, coconut oil, eggs, orange juice/zest. Slowly add it to the flour mixture and mix all ingredients until the batter is smooth.
Bake for 30 minutes or until a toothpick inserted into the center of the cake comes out clean.
Allow the cakes to fully cool before frosting.
To make the avocado frosting, add the avocados to a food processor and blend until no chunks remain. Add the remaining ingredients and process on high until the frosting is dark brown and blended well.
To frost the cake, frost the top of one, add the second cake on top, and use a knife to spread the frosting all over the cake. This avocado frosting is less thick that typical frosting so it will spread easily. Top with additional orange zest (if you like) and serve within one day.
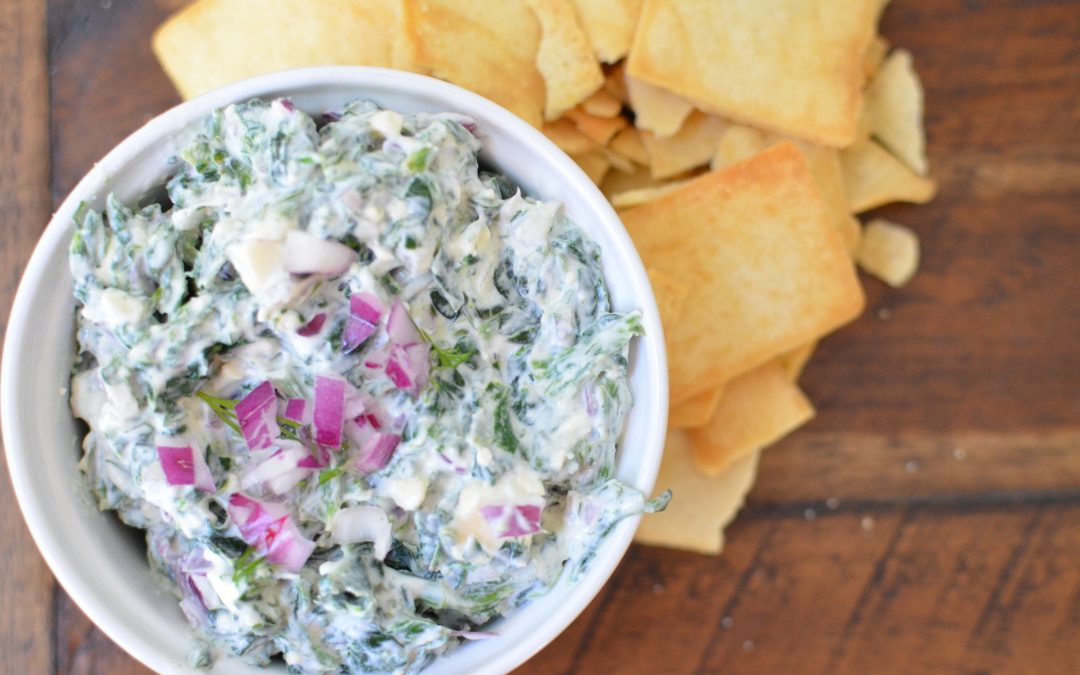
Red onions are a kind of root vegetable. Did you know that root vegetables are an OrganWise Guys December Foods of the Month? Grocery stores often have three kinds of onions – red, white and yellow. This recipe for Red Onion Spinach Dip uses the red kind, which is perfect for dishes where the onion is not cooked. Since red onions are flavorful raw, they are best in sandwiches, dips and salads. Save white and yellow onions for sautéing and cooking.
If you love spinach dip then you will love this Red Onion Spinach Dip! We have served it on several different occasions and each time everyone asks for the recipe. The best thing about this Red Onion Spinach Dip is that it is served cold, instead of cooked. Also, the feta cheese and dill give it a totally delicious taste, without lots of added fat or grease. However, the secret of this recipe is the red onion, which gives it a nice bite and a burst of flavor. By avoiding lots of cheese and sticking with mostly Greek yogurt, this recipe is full of protein. And, the spinach is full of iron.
As you can tell, we can list a lot of reasons why you should make this recipe for yourself and try it! Know that you can feel good about eating this Red Onion Spinach Dip. It’s perfect for healthy holiday entertaining!
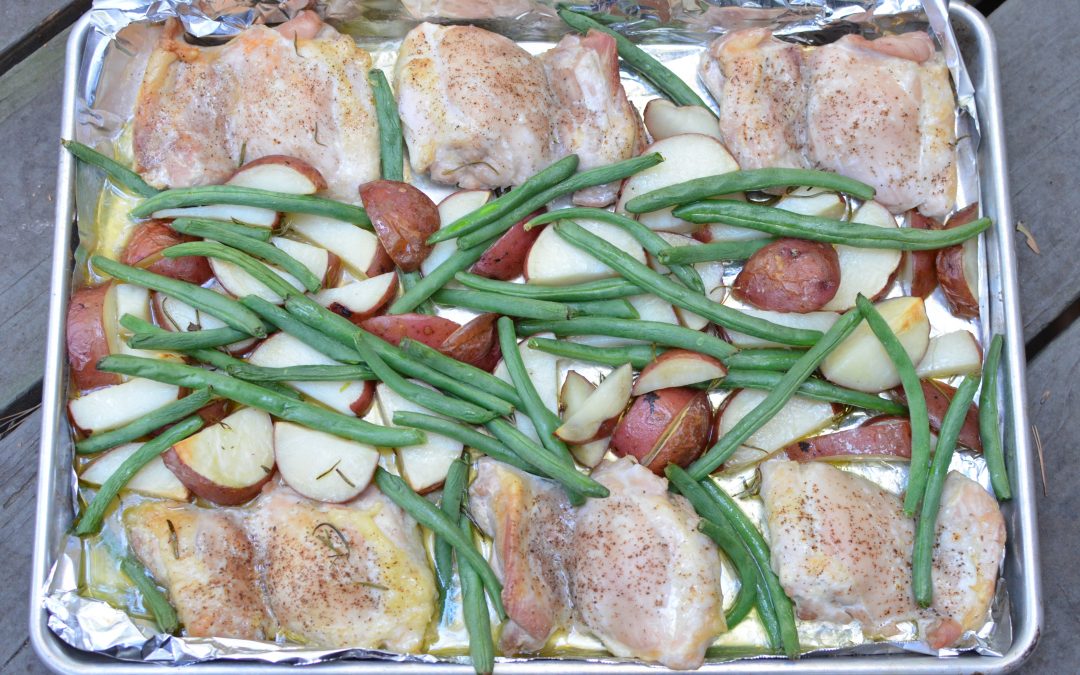
Chicken! Many people love this lean meat for its tasty flavor and versatility. Chicken is an excellent option for beginner chefs because it is so easy to prepare. Weeknights can be crazy so the easier the dinner recipe, the better. Enter our recipe for One Pan Chicken and Veggies. We promise that it does not get much simpler than this for a healthy, satisfying and complete meal!
For One Pan Chicken and Veggies, or any other recipes involving chicken, it is a great idea to purchase the chicken in bulk if your budget allows. Freeze the chicken first. Then, thaw in the refrigerator 48 hours before you plan to cook the meal. When you have the meat on hand already, not only is it cost effective, but it makes preparing your dinner that much easier. For the vegetables, this recipe uses red potatoes and green beans but you can serve whatever is in the fridge (tomatoes, broccoli, carrots or sweet potatoes work well). It takes minutes to prepare, and is hot and ready on the table in under 30 minutes. It doesn’t get much easier for a home cooked meal.
View our Foods of the Month Kit for more simple, tasty and healthy recipes. There are excellent ideas for making healthy foods a part of your daily routine and involving the whole family in learning about nutrition!
The OrganWise Guys feature sweet potatoes as a Foods of the Month in November.
Are sweet potatoes part of your Thanksgiving meal? We hope so! Sweet potatoes that are prepared simply (think roasted or mashed) are the healthiest kinds. A roasted sweet potato with a little butter, brown sugar, or maple syrup is delicious. Or, make mashed sweet potatoes with Greek Yogurt instead of heavy cream. Have you tried these recipes before? Toppings like marshmallows or lots of added sugar tend to mask the sweet potato’s natural flavor. Because sweet potatoes are naturally sweet, they are excellent in baked goods, like this recipe for Sweet Potato Muffins. It’s pretty simple; just add mashed sweet potato to a regular muffin recipe.
We love these Sweet Potato Muffins because they are incredibly moist. By using lots of this flavorful, Vitamin A-rich vegetable, you don’t need a lot of added sugar or other flavors. The sweet potato flavor holds its own. It also provides a good amount of fiber. To save time, cook your sweet potatoes in the microwave instead of roasting them in the oven. Consider serving this simple breakfast on Thanksgiving Day. Your family will be impressed that this muffin recipe is actually made with a healthy vegetable!
First, make your sweet potato mash. Pierce the sweet potatoes with a fork about 10 times, cover with a paper towel, and cook in the microwave for 12 minutes, or until they are soft (microwaving time will vary).
Let the sweet potatoes cool for 10-20 minutes, until they are easy to handle. Now is a good time to prepare your other ingredients.
In a large bowl combine the dry ingredients (flour, cinnamon, baking soda, baking powder, salt and sugar).
In a separate bowl, combine the wet ingredients (coconut oil, eggs, and vanilla).
Now, cut the sweet potatoes in half the long way, scoop out the flesh into a large bowl, and use two forks or a potato masher to mash them.
Stir the wet ingredients into the dry ingredients, and then add the sweet potato mixture. Combine thoroughly.
Spray a muffin tin with nonstick spray and transfer the batter, filling each muffin cup about 2/3 of the way to the top.
Bake for 30 minutes, until the muffins are cooked through (test this by inserting a toothpick into one muffin. It should come out clean.).

 Save Recipe