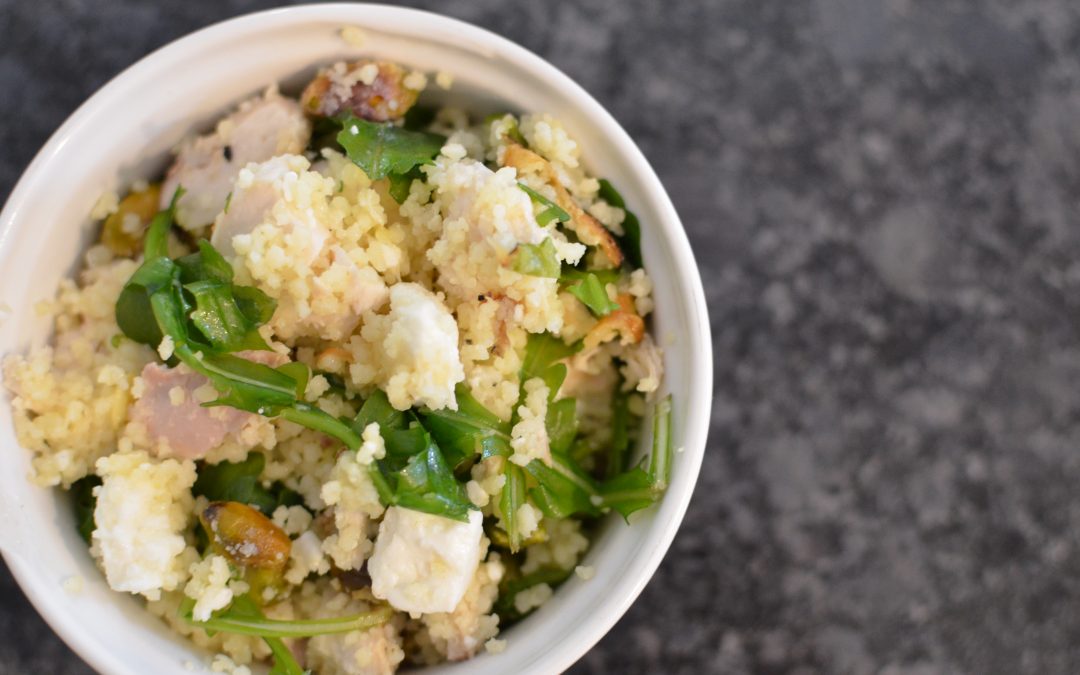
Have you made couscous before? This North African dish is known for “being so nice they named it twice!” Couscous are tiny balls of dried pasta that only take about 5 minutes to prepare. They make a great base for this Healthy Couscous with Feta recipe.
Feta cheese, with 6 grams of fat per ounce, is reduced-fat dairy, which is a February Foods of the Month. Feta has a salty taste that we love, especially when paired with the savory flavors in this Healthy Couscous with Feta recipe like lean chicken breast, zucchini and toasted pistachios. What also goes well with feta? Extra virgin olive oil, of course! There is a hefty dose of extra virgin olive oil (also a February Foods of the Month), in this recipe to keep you full while also promoting heart health.
This recipe takes only 30 minutes to prepare. It makes a large portion that can be enough for a family dinner plus leftovers. Or, make it as part of your weekly mealy prep and eat it for lunch for a week. The combination of ingredients in this Healthy Couscous with Feta recipe is one that you can feel good about eating.
Chop the zucchini and the summer squash into bite size pieces, drizzle with extra virgin olive oil, sprinkle with salt and cook for 25 minutes, until the vegetables are tender and slightly brown.
While the vegetables are roasting, make the couscous and the chicken.
Cook the chicken breasts using a nonstick pan on medium heat for 10 minutes until no pink remains. Let cool then shred with two forks.
In a saucepan, boil 2 cups of water. Add the couscous, remove from heat, cover, and let stand for 5 minutes. Fluff with a fork.
Using a large bowl, combine all the ingredients. All the couscous, chicken, feta, pistachios, and arugula. Mix together to combine. Add the extra virgin olive oil and salt, and mix again.
Once the zucchini and the summer squash have finished roasting, allow them to cool for 5 minutes then add to the couscous mixture and mix again to combine all ingredients.
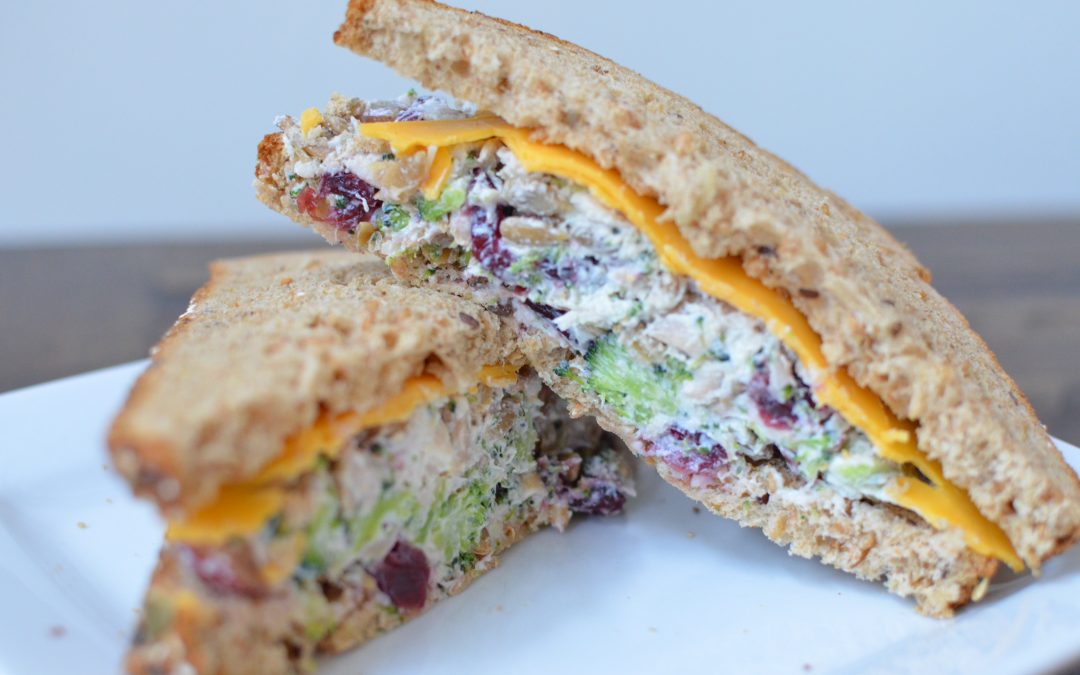
If you are anything like us, you want to have simple, easy to make lunches that are also nutritious. Lunches like these are even better if you can prepare them in bulk at the beginning of the week and grab them from the fridge before heading out the door in the morning. Not only is this much more convenient than having to purchase meals each day, but it is also much cheaper. That’s why we love this Broccoli Chicken Salad recipe.
This recipe for Broccoli Chicken Salad can be prepared and stored in the refrigerator for up to one week. We love it because it’s full of broccoli (a cruciferous vegetable), which is a January Foods of the Month. Broccoli is an excellent source of Vitamin C. One serving has more than 220% of your daily requirement! It is also a good source of fiber and potassium.
This Broccoli Chicken Salad recipe is also packed full of protein thanks to the chicken, Greek yogurt and pumpkin seeds. If you decide to eat it on whole grain brain with a slice of cheese, you will also add more fiber and calcium to this nutrient packed meal. Or, enjoy it plain, it’s that delicious!
Using a nonstick pan on medium heat, cook the chicken breasts until no pink remains, about 10 minutes. Let cool and transfer to a large mixing bowl. Shred with two forks.
Add the broccoli, sliced almonds and craisins to the chicken and mix well.
Next, add in the honey, apple cider vinegar and plain Greek yogurt. Use a spoon to mix all ingredients together. Taste and add salt and pepper, if desired.
For the best taste, let the flavors combine for 2 hours before serving. Store in the refrigerator for up to one week.
Who loves hummus? We do! Hummus is a tasty dip for veggies and crackers that is made with chickpeas. Since we enjoy hummus so much, why not experiment with a different type of bean? Beans like chickpeas, black beans, and Great Northern Beans are a January Foods of the Month. For this Easy White Bean Dip, we use Great Northern Beans.
The great thing about making your own dip is that it is cost-effective, and super simple. You can also experiment with different herbs and spices to really customize your recipe to flavors that you love. For example, in this recipe, you could add some fresh rosemary instead of parsley or some red chili pepper flakes if you like spiciness. It’s fun to play around with the different combinations when you make your own foods! To make this Easy White Bean Dip, as well as any other bean dip, you will need a food processor or a blender. Other than that, it’s incredibly easy to make bean dips, like the title of this recipe suggests. Enjoy!
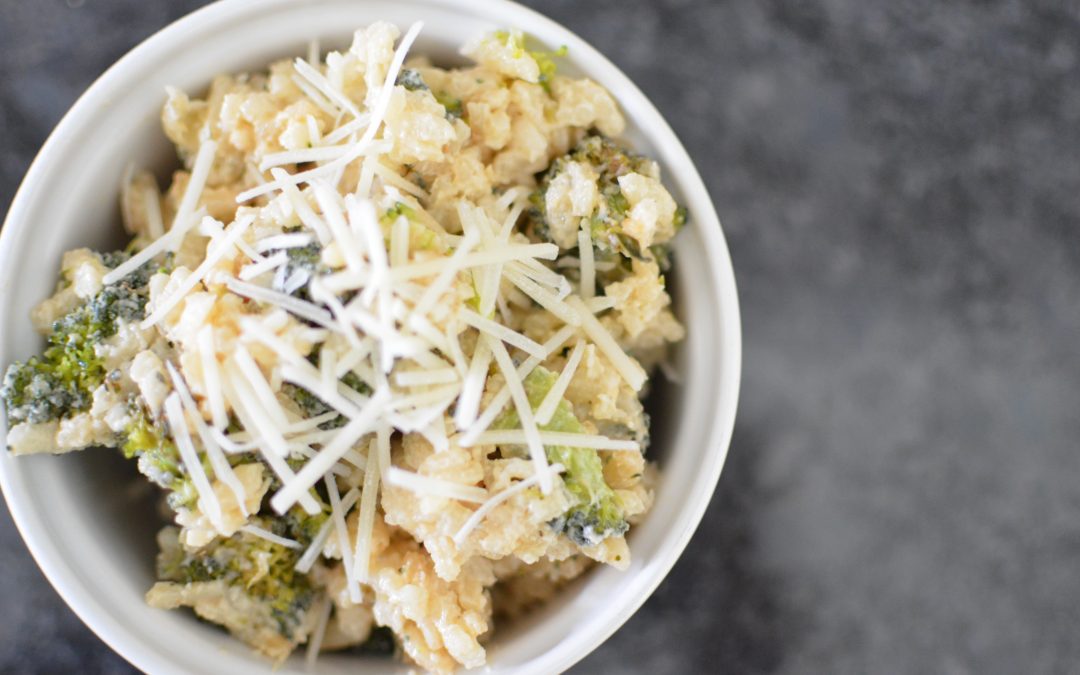
Have you ever made risotto before? It seems like an intimidating dish, but we promise it is easy! This recipe for Broccoli Parmesan Risotto is the perfect cold weather comfort food. It is also loaded with nutrients. Thanks to the broccoli, you are getting a full day’s worth of Vitamin C, plus lots of fiber and potassium. Broccoli is a type of cruciferous vegetable, which is a January Foods of the Month.
To make risotto, always choose low-sodium chicken or vegetable broth. The regular versions of broth add lots of unnecessary sodium to your dish. And, with flavors like broccoli, roasted garlic, and parmesan in this recipe, you really do not need any extra salt for flavor!
This Broccoli Parmesan risotto is tasty with salmon or grilled chicken. And, you can have leftovers for lunch the next day.
Chop the broccoli into small pieces, then transfer to a baking pan with the garlic cloves. Drizzle the broccoli and garlic with olive oil. Cook for 25 minutes, or until the broccoli is slightly blackened (this makes it taste delicious!).
While the broccoli and garlic are roasting, use a medium-sized pot on your stovetop set to medium heat to cook the onion in a little bit of olive oil until it begins to brown, about 10 minutes.
Add the arborio rice to the onion, then add 1 cup of the low-sodium chicken broth. Reduce heat to low.
Regularly stir the rice until it begins to absorb the broth. Once the first cup is absorbed, work your way through the rest of the broth, adding about 1/2 cup at a time. This whole process should take about 25 minutes, or about the same time that your broccoli is roasting.
Once all the broth has been used, taste a little bit of the rice to make sure it is cooked through and not crunchy. Add more broth if needed.
Mix in the parmesan cheese and the milk. Continue to stir until the cheese is melted.
Finally, add the roasted broccoli florets, and chop the garlic and add it as well. Mix well to combine flavors.
Serve with an additional topping of parmesan cheese.
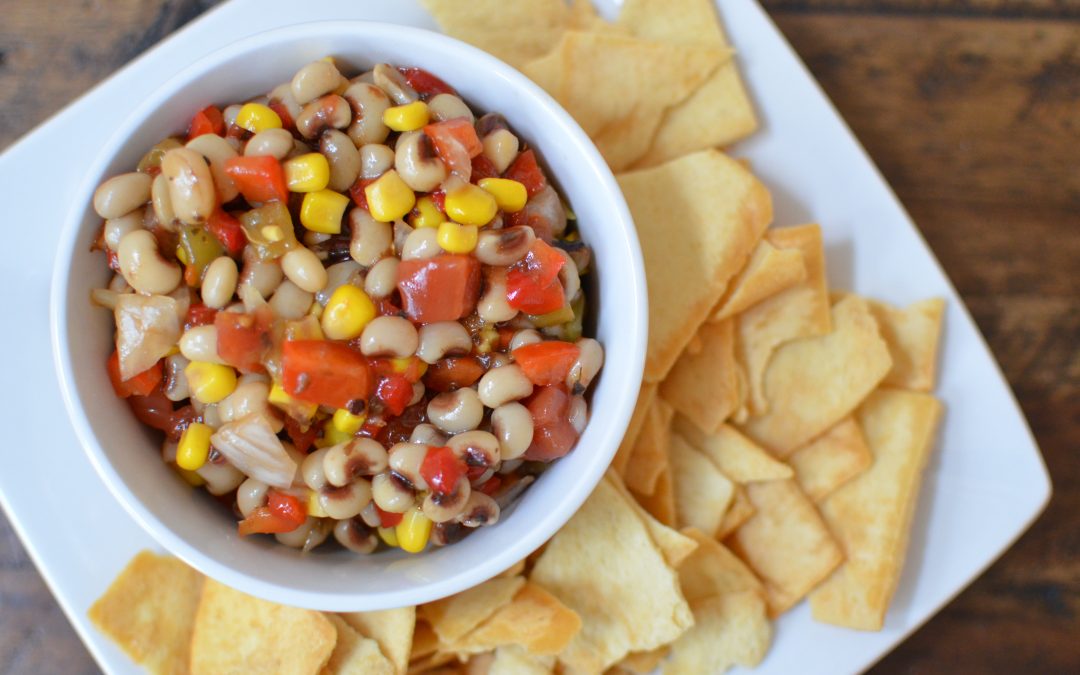
Happy New Year! The Foods of the Month in January are dried beans and peas and cruciferous vegetables. Black-eyed peas are dried beans and peas. Furthermore, they are an excellent source of protein. Use them in lots of dishes, since they are packed with nutrients.
Celebrate the beginning of 2017 and serve this healthy dip at your next gathering. Alternatively, make a batch and eat it for lunch with a fork for a quick, nutritious bite to eat. This Black-eyed Pea Dip is really like a salad since it is full of vegetables and nutrition.
Budget-Friendly Shopping Tips.
This Black-eyed Pea Dip is also budget friendly because you are using mostly canned vegetables, which are known to be cheaper than fresh vegetables. Frozen vegetables can be a healthier choice than canned because the high sodium content is high in some canned vegetables. So, if you do pick canned, be sure to choose the low-sodium versions when grocery shopping for this recipe.
In addition to the canned vegetable section, check the frozen vegetable aisle for black-eyed peas. Legumes are often times located in the frozen section of the supermarket as well. This is a helpful tip in case you are in need of ingredients that you cannot find in the canned aisle.
Did you know that you could eat pie for breakfast? This easy Orange Breakfast Pie is a great option to make the night before you have guests for breakfast. The best part is that it only looks complicated; it should not take more than 30 minutes of “hands on” time to make.
This Orange Breakfast Pie crust is made with nuts instead of pastry dough so it provides a serving of protein and good fats. The pie filling is made with healthy ingredients like cottage cheese and the juice and zest from oranges. Thanks to the orange (a citrus fruit) it is also packed with Vitamin C. We love the subtle citrus flavor of the filling combined with the nutty flavor of the crust. We think it is the perfect compliment to coffee for adults. Kids can have it with a glass of milk instead. The best part of this recipe though is that it is nutritious!
Preheat the oven to 375 degrees and line the inside of a 8 inch cake pan with tin foil. Spray well with nonstick spray.
Use a food processor to grind up the cashews so they are chunky, not finely processed. Set aside.
Add the flour to the nuts, then add the rest of the ingredients for the crust, except the egg white. Using your hands, mix the ingredients until they are combined.
Add the egg white and continue using your hands to mix until the mixture loses its stickiness.
Transfer the dough into the cake pan and press up the sides and bottom until it is evenly distributed.
Bake for 15 minutes until the crust is golden brown.
Let the crust cool while making your filling and reduce the oven temperature to 350 degrees.
Use your food processor again to add in all the ingredients for the filling. Blend until smooth.
Pour the filling into the cooled crust, transfer to the oven, and bake until the filling just begins to rise, about 35 minutes.
Let cool completely at room temperature and then refrigerate overnight.

 Save Recipe